Choosing a block

Laying out the pipe in the block by plotting the bowl diameter.

Ready to mount in the 2-jaw chuck.

Before turning the top of the bowl on the lathe, a ring needs to be made that will be inserted into the top of the bowl. The ring will serve as a "mortise" for the bowl insert.

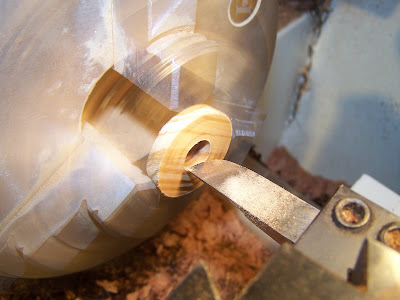
The ring has been turned, polished, and cut off.

The briar portion of the bowl insert must now be turned.

Flipped around in the lathe, the tobacco chamber is now bored. I prefer to use a boring bit on the tool post rather than an S & D or spade bit in the tailstock. It creates a cleaner cut and I can control the wall thickness more easily by turning the outer profile of the bowl in accordance with the profile the chamber will have.

Here you see that the top of the bowl has been cut, a shoulder cut to receive the ring. The depth has to be precise so that the top remains flush.


Once the top of the bowl has been turned and the ring fit, everything else is done completely by hand. Here I'm beginning to shape the pipe on the 36 grit wheel.

The bottom profile is the first to emerge.

More material has been removed and the pipe is beginning to take shape.

The symmetry of the pipe must constantly be checked.

The pipe now has its final rough shape and is ready to be drilled.

Here I've already drilled the mortise and draft hole by hand. I will drill one small hole through the bowl where the expansion chamber will eventually be. This hole must intersect the draft hole precisely so that the expansion chamber can be routed out later.

At this point, the holes are connected, but the expansion chamber must be routed out by hand making sure to keep the wall thickness even and allow enough room for the bowl insert to slide in without touching the chamber at any point.

Here the expansion chamber has been completely routed out and is ready to receive the bowl insert.

Now the bowl insert must have a dome. For this piece, I've chosen Zebrawood.

The blank for the dome is roughed out on the shaping wheel so that it can be held in the lathe's 3-jaw chuck.

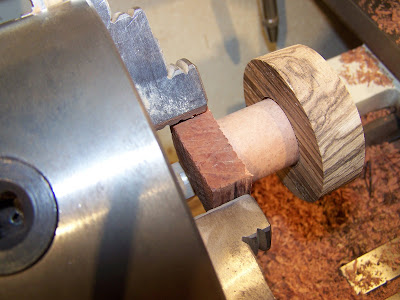
With the blank in the lathe, I can now turn the inset for the dome to receive the briar bowl. Note that it must have a small inset shoulder so that the collar on the bowl insert is inset rather than laying on the face of the dome's underside. Again, the measurements must be within a couple thousandths so that the bowl insert contacts the face of both steps.

Here's a close-up of the inset shoulder.

Now the briar insert can be dry fit into the Zebrawood.

At this point, a mandrel must be turned for the Zebrawood blank. It cannot be held in the chuck for turning. Items such as this mandrel are throw-away's. They are essentially one-off tools that have to be made during the creation process. Perhaps this will end up as a tool handle somewhere down the road, but it has no function with respect to the pipe itself.

Here the Zebrawood is mounted on the mandrel and can now be turned to shape, sanded, stabilized, sanded some more, and polished.

The 13/16" chamber diameter must be matched exactly and will be created with a plunge-cut from the tool post.

Here the dome has been turned to shape and the plunge cut is being made. If it is even a millimeter too large, the process has to start over again or the bowl insert will have a "step" when the two are joined.

The finished Zebrawood dome.

Here, the briar bowl insert, and Zebrawood dome are dry-fit into the Calabash stummel.

A close up of the three elements.


Now the stem must be cut. No "golden ratios" or exact measurements are used to determine the length of the stem. The best tool here is an experienced eye.

Here, the dome on the stem is turned, and the rod stock is drilled for its delrin tenon. It will also get a tapered draft hole at this point.

Here the blank is fitted to the stummel.

The stem has now been rough shaped on the 36 grit wheel.

Another shot.

Now the stem must be filed, sanded, and polished.

Here the fit is being tested.

Now the stummel is almost ready to be blasted. I never use tape to mask the top for the simple reason that an edge can pull up during the blasting process. This can ruin the finish of the entire piece. Instead, I turn a "plug" to insert into the expansion chamber and mask the top during the blasting process.

This is the "donut" that will fit down over the plug and protect the top of the pipe during the blasting process.

The finished plug--another "throw away."

Here's the pipe wearing its funny hat and with a delrin plug in the mortise. The shank will be refaced after the pipe has been blasted.

Before blasting, the pipe is taken down to 320 grit on the wheel.

Now its shank is polished and masked for stamping. Ready to blast!

Here the pipe has been blasted for depth.

Look at those rings!

Now it's time to cut the Zebrawood shank ring.

The ring also has to be sanded, stabilized, sanded again, and polished while on the lathe.

Here's a shot of the pipe with everything dry fit.


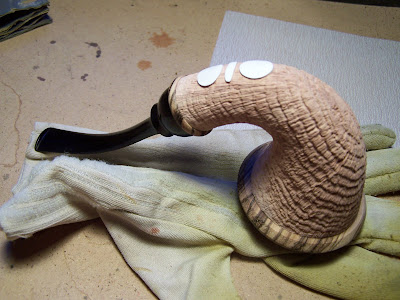
Here the pipe has been blasted for detail. Notice the way the rings stand out in sharp relief.


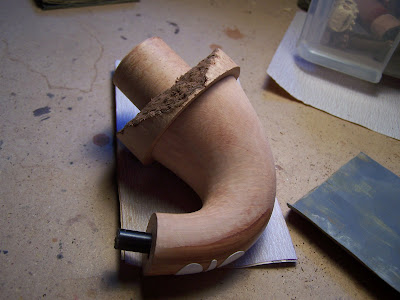
Now the stem is bent and the pipe takes its final shape.

The elements of the bowl will be fit together, adhered, and then finished.

Here the pipe has received its understain.

Note that the stem inserted into the pipe is just a handle.

Now the pipe receives its "overstain," a coat of black.

Another close up.

The top of the bowl is smooth and will be finished in high contrast.

After the black has been sanded off.

Now the lighter stain can go over top and the top can be polished and waxed.

The masking is removed and the pipe can now be stamped.

Here she is in all her glory.

Ring-grain anyone?

And another . . .

And one more for good measure.
And THAT is why high-grade pipes are expensive!

Well done Todd. Fantastic pipe!
ReplyDeleteSplendid ! Remarquable work !
ReplyDeleteToo Cool Todd
ReplyDeleteHoly Moses.
ReplyDeleteA great sequence on the making of a beautiful pipe--very nicely done, Todd!
ReplyDeleteTodd,
ReplyDeleteSimply amazing. Tough to put a value on perfection, you moved through those sequences like mikhail baryshnikov....
Nice Pipe Bag :-))
ReplyDeleteSurprised you made it that far, Neil. :-)) And yes, it is a fine pipe bag.
ReplyDeleteTJ
Yeah I'm old now, my attention span is shortening rapidly :-))
ReplyDeleteI hear that from a lot of Dead fans!!!!!!!! :-))
ReplyDeleteI'm pipe smoker striving in japan.
ReplyDeleteUntil now,I prefer Danish style and Danish origined Japanese pipes.
Today,I have the honor of seeing this fabulous pipe,and then I regard that American pipe is such a beautiful for the first time in my life.
So,if popossible,Could you inform me this remarkable pipe's availability.